Transform
Pans, scales, and rotates a texture, with repeat, mirror, or clamp wrapping outside its edges.
The Transform node moves the sampling coordinates of its input: pan it, scale it, rotate it around a pivot, and choose what happens beyond the edges.
- One texture in, one texture out
- Scale and rotation happen around the Pivot; Translation and Point of Interest pan afterwards
- Three wrap modes — Repeat, Mirror, Clamp
- Found in the node graph under Texture in the operators panel
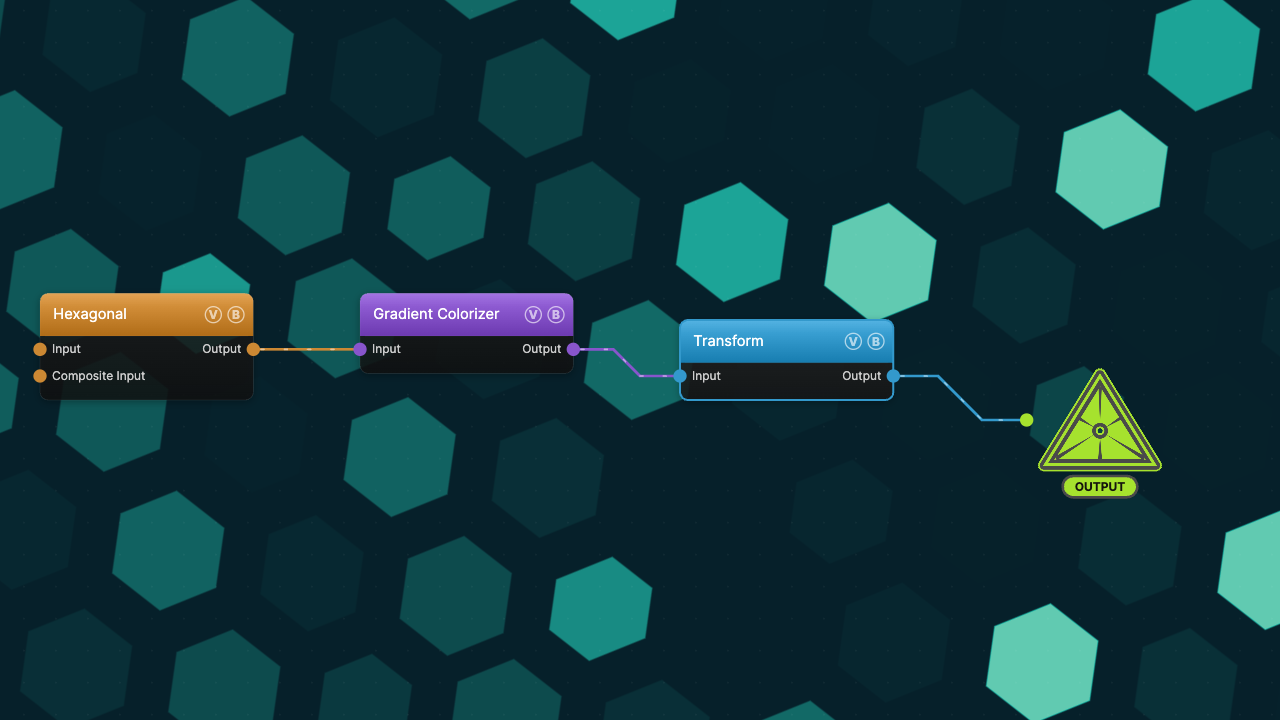
The image on the right is the example patch itself — drag and drop it onto the app (or load it with File → Load) to open the full graph. It scales a colorized Hexagonal pattern down to 0.6, rotates it 22°, and mirrors the wrap.
Inputs and outputs
| Port | Type | Purpose |
|---|---|---|
| Input | Texture | The texture to transform. With nothing connected the node outputs nothing. |
| Output | Texture | The transformed texture, at the project's output resolution. |
Parameters
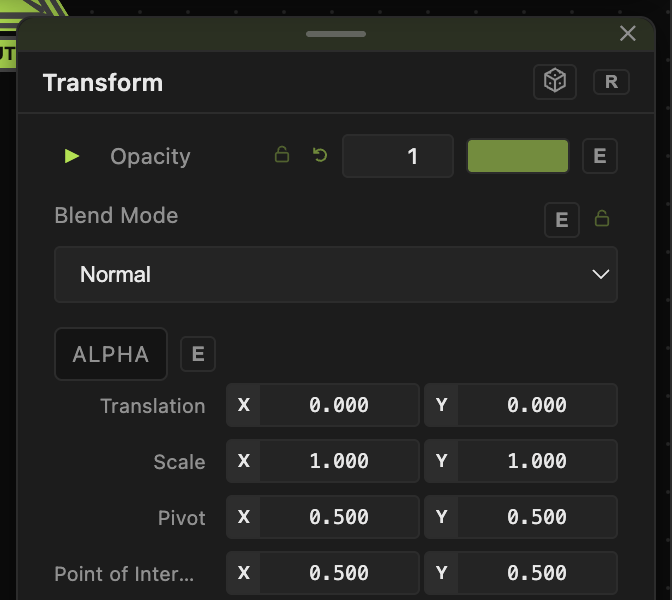
The panel shows the XY pairs as compact numeric rows — Translation, Scale, Pivot, Point of Interest — and repeats each axis as its own slider under ANIMATE, where it gets an animation bar.
- Translate X / Translate Y (−2 to 2, default 0) — pans the image. Positive X moves it right, positive Y moves it up.
- Scale X / Scale Y (0.01–10, default 1) — magnifies each axis. Above 1 zooms in; below 1 shrinks the image and reveals the wrap.
- Uniform Scale (0.01–10, default 1) — multiplies both axes at once. It stacks with Scale X/Y rather than replacing them.
- Rotation (−180 to 180 degrees, default 0) — rotates around the pivot. Aspect-corrected, so a non-square output rotates without shearing.
- Pivot X / Pivot Y (0–1, default 0.5) — the centre that Scale and Rotation work around. 0,0 is one corner, 1,1 the opposite.
- POI X / POI Y (0–1, default 0.5) — Point of Interest, a second pan measured from the centre. POI X 0.6 does the same thing as Translate X 0.1, and the two add together. It accepts values slightly past its slider range, out to −0.5 and 1.5.
- Mode — what happens outside the source: Repeat (default) tiles it, Mirror ping-pongs each tile so edges meet, Clamp fills out-of-bounds with black.
Every slider has a per-parameter animation bar, so any of these can be animated, audio-driven, or MIDI-mapped — see Parameters and Controls.
The ALPHA toggle does work: it sets the output's alpha from luminance — black becomes transparent, white stays opaque — leaving RGB untouched. Useful right before a Blend stage.
Order of operations
Scale is applied first, then rotation, both around the Pivot. Translation and Point of Interest pan the result afterwards, so a rotated image still pans along the screen axes rather than its own. Wrapping is the last step.
Examples
Slow drift — animate Translate X with a slow LFO and leave Mode on Repeat. The pattern scrolls seamlessly.
Kaleidoscopic tiling — Uniform Scale 0.4, Mode set to Mirror. The source shrinks to a tile and the mirror wrap makes the tile edges continuous.
Off-centre spin — Pivot X 0.2, Pivot Y 0.8, then animate Rotation. The image swings around the corner instead of turning in place.
Troubleshooting
Hard seams across the image — Repeat wrapping shows a seam wherever the source's edges don't match. Use Mirror instead, or a generator whose pattern tiles.
Scale slider seems to do nothing at high values — check Uniform Scale too; it multiplies Scale X/Y, so a small Uniform Scale can cancel a large per-axis scale.